
Before and after
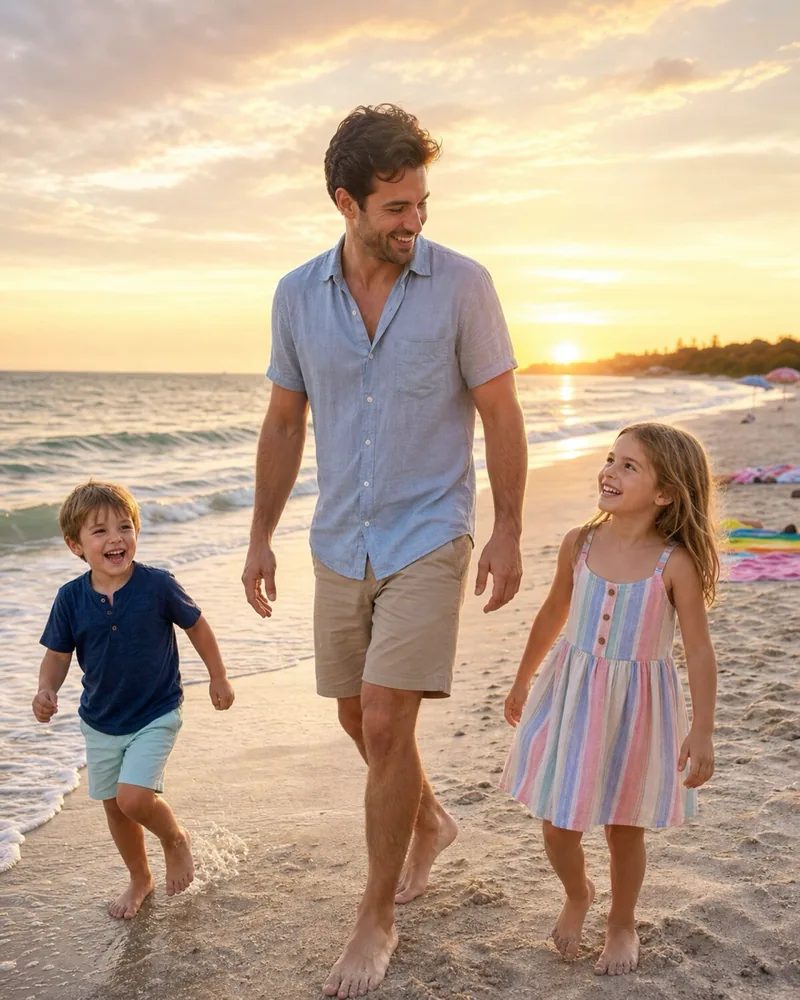
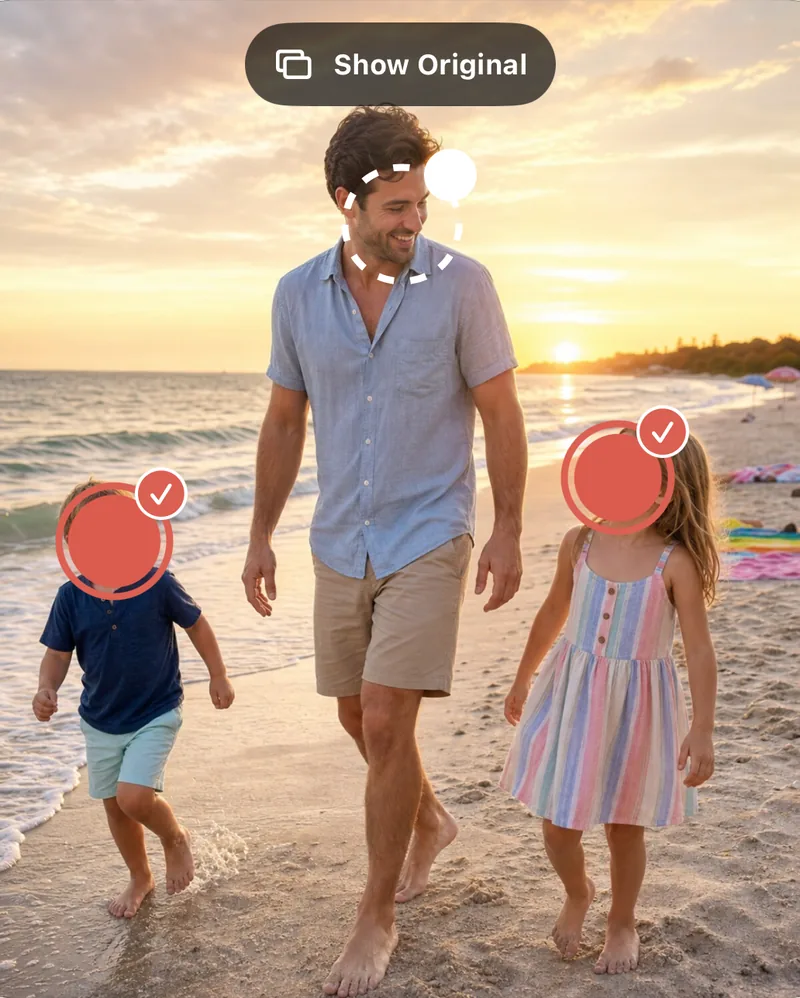
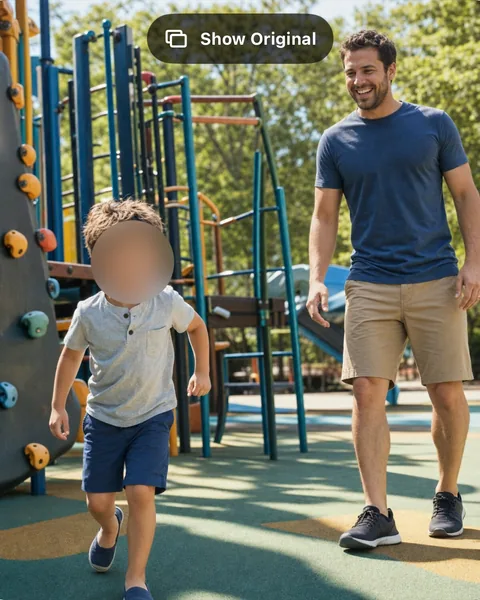
Two children covered, the adult left visible
Here is one photo before and after it was edited in Blur Photo & Face Censor. The app found three faces. Only the two children were selected, so only they are covered.
Before and after
The actual screen
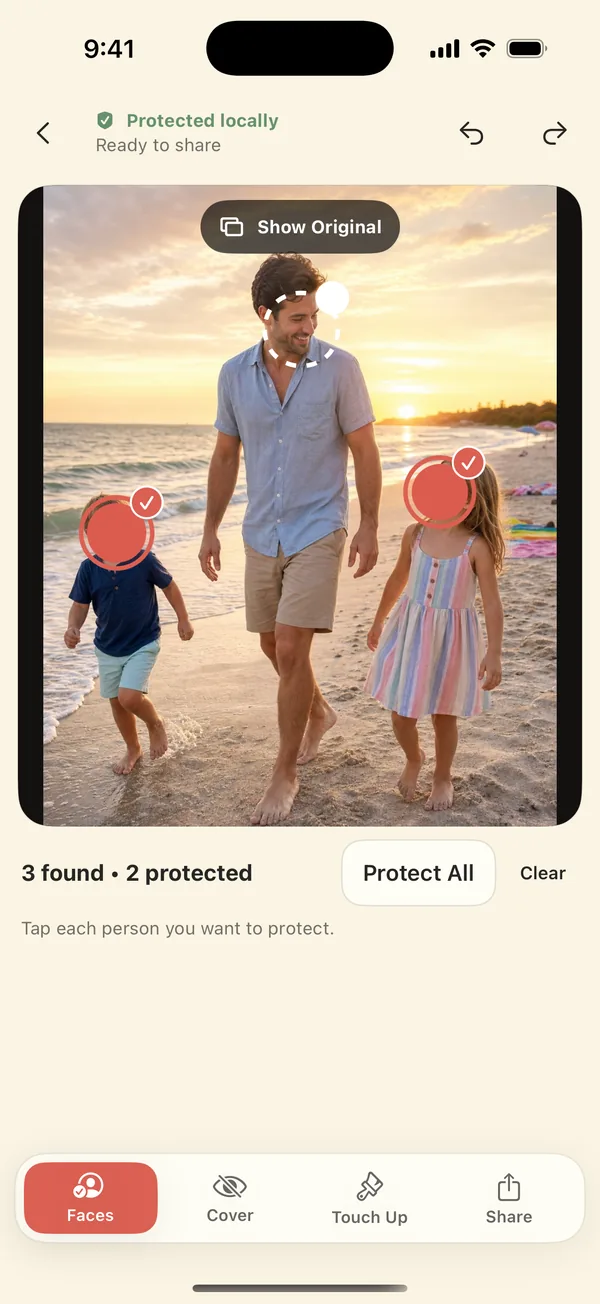
This is the whole Faces screen the comparison was cropped from. Here's what each part shows:
- “3 found · 2 protected”
- This saved example shows three face regions, with two selected for covering. The fixture’s regions and selections were set up in advance; always check the faces in your own photo.
- Checkmarked coral circles
- The two faces you chose. Privacy Cover is a solid fill, so no facial detail shows through.
- Dashed ring on the adult
- A detected face that isn't selected. It stays visible in the shared copy.
- “Tap each person you want to protect.”
- Selection is manual. Protect All is there if you want every detected face covered.
- Show Original
- Lets you compare with the untouched photo before you export.
How to get this result
- Choose Photos. Pick the photo, or a batch of up to 20, with Apple's photo picker.
- Faces: tap each child. Every face the app finds gets a ring. Tap the ones to cover and leave everyone else alone. Check for faces it missed, like small, side-on or reflected ones.
- Cover: choose Privacy Cover. Drag the Size slider until the circle covers the hairline and jaw, not just the eyes.
- Touch Up: catch the rest. Use Hide to brush over a missed face, a name badge or a school logo. Use Restore if you covered too much.
- Share: export a separate copy. Export a new JPEG or PNG and leave the original as it was. Then open the exported file in Photos and zoom in on every face before you send it.
The last step matters because this page shows the editor preview. Always check the file you're actually sharing.
Opaque cover or soft blur?
Both of these are in-app previews of AI-generated sample photos. The blur example is a different sample photo, captured from the same editor.
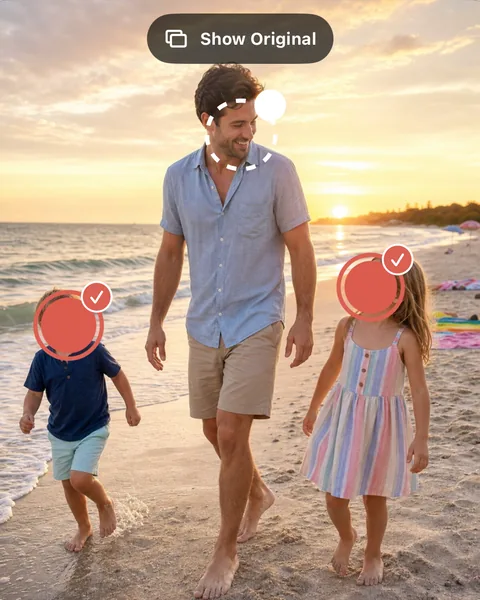
Mosaic and Emoji sit in between. Compare all four in blur vs mosaic vs cover vs emoji.
What this example doesn't show
- A real family photoThe sample is AI-generated. How well detection works on your own photos depends on lighting, face size and angle.
- An exported fileIt shows the editor preview. The export is a separate JPEG or PNG without location, capture date or camera details, but you should still check it yourself.
- Automatic child detectionThere isn't any. The app finds faces, and you choose which ones to cover.
- Plates or text found for youThe app only detects faces. You cover plates, names and signs yourself with the Hide brush.
- Guaranteed anonymityA cover can't hide clothing, captions or location context, and it can't stop someone screenshotting or forwarding the photo.
- VideoThe app edits photos only.
Cover only the faces you choose.
$4.99 once in the U.S. App Store. No subscription, no in-app purchases, no upload. iPhone and iPad, iOS 17 or later.
 Scan with your iPhone
Where these images come from: the sample photo was generated for the app's demo set. The screens were captured in the iOS Simulator using a debug-only capture mode with pre-set face selections. They were captured in August 2026, so small layout details may differ in the current App Store version. The images were only resized and cropped for this page.